 Bellingham Siding
 Building Sehome Homes Right From the Window Rough-In Forward
Sehome sits close enough to Bellingham Bay and the surrounding hills that new construction here has to answer to a specific mix of weather: salt-laden air drifting up from the water, wind-driven rain that doesn't just fall but pushes sideways into wall assemblies, and a long, damp moss season that starts in fall and doesn't really let go until late spring. When we install windows in a new-construction Sehome home, we're not just setting glass into rough openings — we're building the first line of defense against all three of those things, and we're doing it before drywall, siding, or trim ever go up. Get the window installation wrong at this stage and it's cheap to fix. Get it wrong after the house is finished and it's a tear-out.
This page is specifically about new-construction window work in the Sehome area — new builds and full additions where windows are going into fresh framing, not existing openings. If you're replacing windows in an older Sehome home, the job and the priorities are different; new construction gives us the advantage of building the water management system correctly the first time, with no old flashing or hidden rot to work around.
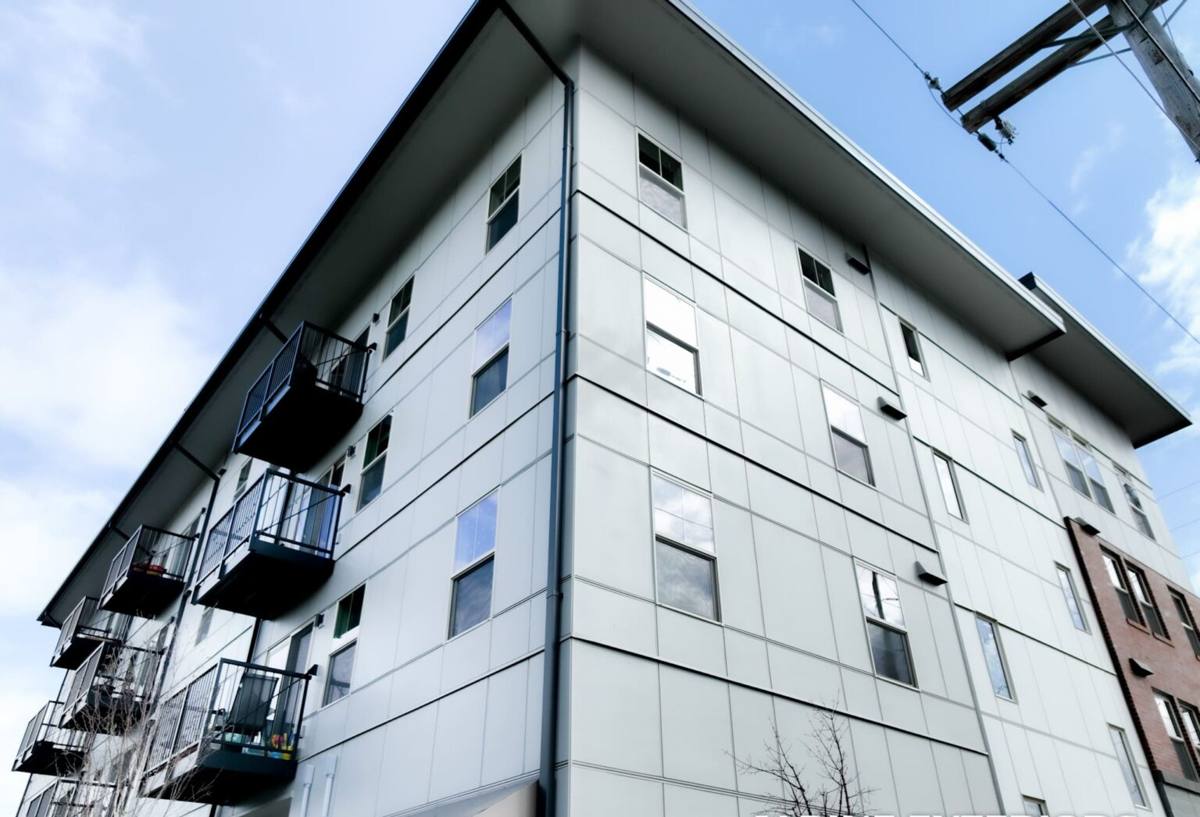
Why New-Construction Installation Isn't the Same Job as Replacement
A lot of homeowners assume "installing a window" is the same task whether it's a remodel or a new build. It isn't. In new construction, the window unit is only part of what we're responsible for — the bigger job is integrating it correctly into the whole wall assembly: the weather-resistive barrier (house wrap), the flashing tape, the sill pan, and eventually the siding. Every layer has to shed water outward and downward, in the right order, so that even in a hard-driven Whatcom County rainstorm, water never gets a path behind the window frame.
That integration work happens in a specific sequence, and skipping steps or doing them out of order is where most window-related water damage in new homes actually starts — not from a bad window, but from a bad installation sequence around a perfectly good window.
What "Correct" Actually Means Here
- Sill pan flashing installed and sloped to drain outward before the window ever goes in
- Window set plumb, level, and square in the rough opening — not just "close enough"
- Flashing tape applied shingle-style (each layer overlapping the one below it) so water always sheds downward and out
- Weather-resistive barrier integrated with the flashing, not just stapled around it
- Proper shimming and fastening per the manufacturer's installation instructions, which is also what keeps the warranty valid
- Interior and exterior sealant joints — backer rod and sealant, not a bead of caulk smeared over a gap
What Sehome's Climate Actually Demands From a Window Package
Bellingham's climate isn't extreme in temperature, but it's persistent in moisture, and persistence is what wears down a poorly installed window over years, not one bad storm. Three specific conditions shape how we spec and install windows for Sehome new builds.
Salt Air
Proximity to Bellingham Bay means airborne salt is a real factor for hardware, fasteners, and finishes, even a few miles inland. We favor corrosion-resistant fasteners and hardware finishes on new-construction jobs in this area, and we're careful about mixing metals in flashing and trim details — dissimilar metals in contact with each other corrode faster when salt air is in the mix.
Driving Rain
Whatcom County storms often come in sideways off the water, which puts real pressure on window flashing details that would be a non-issue in a calmer climate. This is why sill pan flashing and correctly lapped weather-resistive barrier integration aren't optional extras here — they're the difference between a window that stays dry for decades and one that leaks within a few winters.
Moss and Prolonged Dampness
A long wet season means anything that traps moisture against wood trim or sill material stays damp longer, which is exactly the environment moss and rot organisms need. Detailing sills and trim so water sheds cleanly, rather than pooling or wicking, matters more here than in a drier climate — it's less about a single flashing detail and more about making sure the whole assembly dries out between rain events instead of staying saturated.
Window Types and Materials: What We Recommend and Why
There's no single "best" window material for every new build — it depends on budget, the home's design, and how much long-term maintenance the homeowner wants to take on. Here's how the common options stack up for a Sehome new-construction project.
| Material | Moisture Performance | Maintenance | Typical Cost Position |
|---|---|---|---|
| Vinyl | Good — won't rot, handles moist climates well | Low; occasional cleaning | Most economical |
| Fiberglass | Excellent — very stable, minimal expansion/contraction | Low | Mid to upper-mid |
| Wood-clad (exterior clad, wood interior) | Good on the exterior if cladding and flashing are correct; interior wood needs the assembly kept dry | Moderate; interior wood may need periodic finishing | Higher |
| Aluminum | Fair — prone to condensation and conducts cold without thermal breaks | Low | Varies |
For most Sehome new-construction projects, we lean toward vinyl or fiberglass because they hold up well against the region's damp, salty air without the ongoing maintenance burden that wood exteriors carry. Wood-clad windows are a legitimate choice for homeowners who want that interior look and are willing to keep up with finishing — we're glad to install them, but we're upfront that the flashing and cladding details around them have zero margin for error in this climate. If a manufacturer's clad system has a known weak point in a wet climate — a joint, a corner seal, a specific detail — we'll walk you through it honestly rather than let you find out the hard way.
Our New-Construction Window Installation Process
The process is consistent from job to job because consistency is what prevents callbacks. Here's the sequence we follow on a Sehome new build.
- Rough opening check. We verify every opening is framed square, plumb, and to the correct size before any window shows up on site — catching a framing error now is a phone call; catching it after installation is a rebuild.
- Sill pan flashing. A sloped, sealed pan goes in first so any water that ever gets past the window has a built-in path back outside instead of into the wall cavity.
- Weather-resistive barrier prep. The house wrap around the opening is cut and prepped so it laps correctly with the flashing tape that comes next — order matters here.
- Window set. The unit goes in plumb, level, and square, shimmed at the manufacturer's specified points, and fastened per the installation instructions that keep the warranty intact.
- Flashing integration. Tape and/or flashing membrane go over the nailing flange in shingle-style layers — jamb flashing first, then head flashing overlapping it, sealing the whole perimeter against wind-driven rain.
- Weather-resistive barrier tie-in. The house wrap is lapped back over the head flashing to complete a continuous drainage plane before siding goes on.
- Interior air-sealing and insulation. The gap between the frame and rough opening is sealed and insulated correctly — too little and you get drafts and condensation; too much expanding foam and you can bow the frame.
- Final check. Every window gets operated, checked for square and smooth function, and inspected for gaps or flashing issues before we sign off.
Flashing and Sequencing: Where New-Construction Jobs Actually Go Wrong
If you talk to anyone who's dealt with a leaking new-construction window, the root cause is almost always sequencing — a layer installed out of order so water ends up trapped instead of shed. The most common failure point is the weather-resistive barrier being lapped under the flashing instead of over it, which turns the flashing into a funnel aimed straight into the wall. Another common one is skipping the sill pan entirely and relying on caulk alone to keep water out — caulk is a backup seal, not a drainage system, and it degrades over time in a climate as wet as ours.
We sequence every opening the same way, every time, specifically because Bellingham's rain doesn't give a window installer much room for shortcuts. A house near the water with driving rain will find any gap in the sequence within a few wet seasons.
Common Mistakes We See — and Avoid
- Windows fastened before the sill pan is fully cured or sealed
- Flashing tape applied out of shingle order, directing water inward instead of outward
- Mismatched metals in trim and flashing details, which accelerates corrosion in salt air
- Over-filling the shim gap with expanding foam, bowing the frame and causing the window to bind or leak
- Skipping manufacturer-specific fastening patterns, which can void the window's warranty even if the window itself performs fine for years
- Trim and sill details that don't shed water cleanly, giving moss and mildew a place to start
What to Ask Before You Sign a New-Construction Window Contract
Whether you use us or another contractor, these are the questions worth asking on any Sehome new build before window work starts:
- Will a sill pan be installed under every window opening, and what material?
- How will flashing tape be lapped relative to the weather-resistive barrier — over or under?
- Are fasteners and hardware rated for coastal or salt-air exposure?
- Will the installation follow the specific window manufacturer's instructions closely enough to preserve the warranty?
- Who is responsible if a window leaks after siding is installed — the window installer, the siding crew, or is that boundary unclear?
- Is there a written scope covering flashing and weather-barrier integration, or just "install windows"?
If a contractor can't answer these clearly before the contract is signed, that's worth pausing on — new-construction window failures are almost always installation issues, not product defects, and the installation details are exactly what these questions are checking for.
Why Hire a Crew That Already Works in Sehome
A window installer who works across a wide range of climates has to relearn local conditions on every job. A crew that already works Sehome and the surrounding Bellingham and Whatcom County area isn't guessing about how hard the rain drives in off the bay, how far the salt air actually reaches inland, or how long moss season keeps trim and sills damp — that's baseline knowledge from doing the work here repeatedly. It shows up in small decisions: which fastener finish to use, how much flashing overlap to build in beyond the minimum, where to pay extra attention on a north- or west-facing elevation that takes the worst of the weather.
New construction only gives you one real shot at getting the window envelope right before the wall closes up behind it. We treat every opening on a Sehome job with that in mind — not because the code requires it, but because a leak that shows up five years after the house is finished is a much worse problem for everyone than a few extra minutes of careful flashing work today.
If you're planning a new build or addition in Sehome and want to talk through window options, materials, or how our installation process fits your project, we're happy to walk through it. Reach out for a free, no-pressure estimate using the form below.