 Bellingham Siding
 New-Construction Windows in Silver Beach: Getting It Right the First Time
Silver Beach sits along Lake Whatcom in Whatcom County, and any new home going up here — whether it's a full custom build, a lakefront rebuild, or an addition tied into an existing structure — has to deal with a demanding mix of weather from the day the framing goes up. Marine air carrying a mild salt content moves in off Bellingham Bay and settles into the lake basin, driving rain comes off the open water with real force on lake-facing walls, and a shaded, tree-covered hillside setting keeps moss and mildew active across most of the year. A new build is actually the best possible moment to get ahead of all of that, because every flashing detail, drainage plane, and window opening is fully accessible and easy to do correctly before siding, insulation, and drywall close it all up.
We install new-construction windows for homes throughout Silver Beach and the surrounding Lake Whatcom shoreline, working alongside builders and general contractors during the framing and dry-in stages. New-construction window work is a different job from replacing a window in an existing wall — the opening, the flashing sequence, and the coordination with the rest of the build are all different — and it deserves its own set of standards rather than being treated as a smaller version of a replacement job.
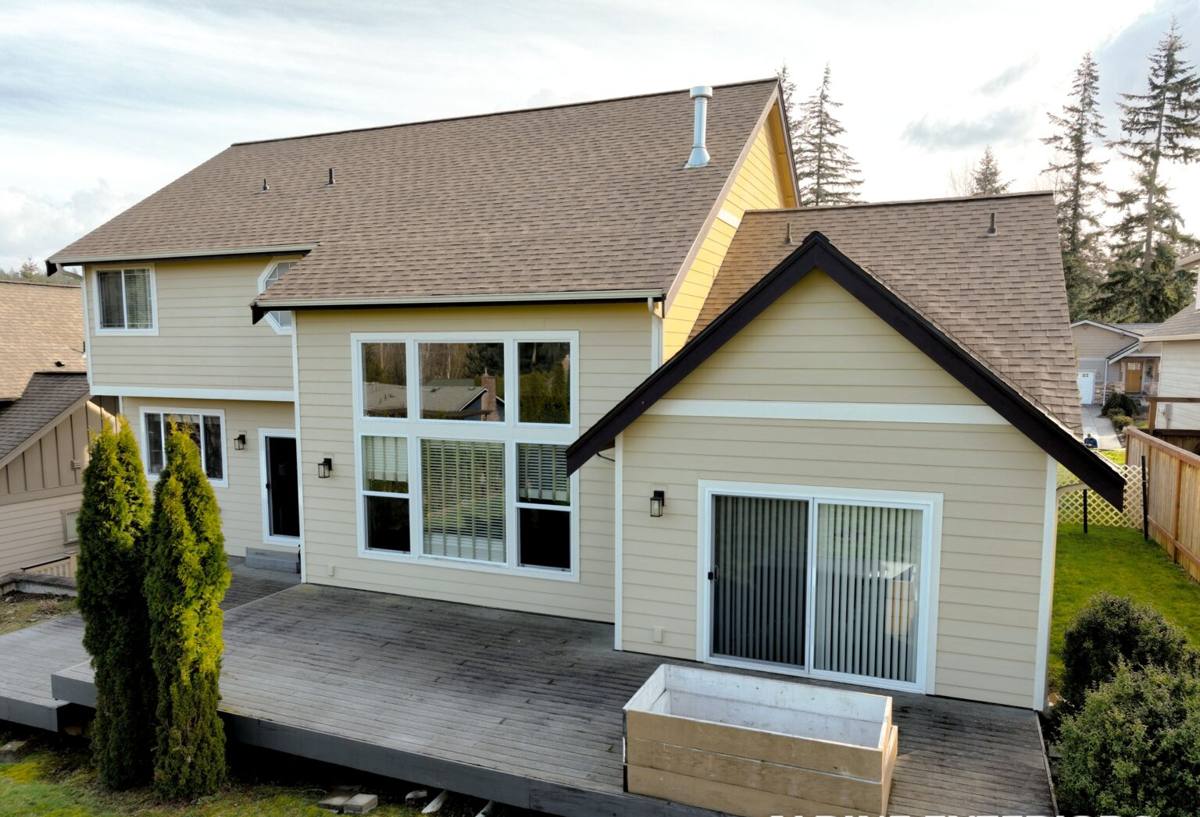
What This Climate Demands Before the First Window Goes In
Salt Air and Marine Corrosion
Air moving inland off Bellingham Bay carries a mild salt content that spreads well beyond the immediate shoreline, and it settles into the Lake Whatcom basin along with the lake's own humidity. On a new build, that means hardware, fasteners, and window finishes need to be chosen for long-term corrosion resistance from the outset, not upgraded later after a few years of pitting or stiff hardware make the problem obvious.
Driving Rain During an Open Framing Stage
Wind moving across open water picks up speed and drives rain into lake-facing walls harder than the same storm would hit a sheltered inland lot. That matters twice over on a new build: it's a real risk during the framing and dry-in period, when window openings are cut but not yet weathered in, and it's the long-term condition every window and flashing detail has to perform under once the house is finished. A lake-facing wall and a shaded, uphill wall on the same new home can face genuinely different wind and rain loads, which should shape the flashing and drainage plan wall by wall rather than applying one generic spec to the whole house.
A Long Moss Season That Starts Working Immediately
Between lake humidity, tree cover on many Silver Beach lots, and the region's regular rainfall, surfaces here rarely get a long, uninterrupted dry stretch. On a new home, that moss and mildew pressure starts acting on the building the moment it's enclosed, which is exactly why drainage and ventilation details around new windows need to be right on day one — there's no gradual break-in period where a shortcut goes unnoticed.
New-Construction Windows vs. Replacement Windows: Not the Same Job
A replacement window is usually installed as an insert into an existing, already-flashed frame, or as a full-frame swap into an opening that's been carrying weather for years. A new-construction window goes into a rough opening in fresh framing, with a nailing flange that gets integrated directly into the weather-resistive barrier and flashing system as the wall assembly is being built. That's a meaningful difference: on new construction, we're not working around whatever flashing decisions were made years ago by someone else — we're setting the flashing sequence ourselves, in the right order, before anything gets covered up. Done correctly, that produces a more reliable, longer-lasting seal than most retrofit work can achieve, simply because there's no old material or hidden damage to work around.
That also means the installer doing new-construction window work needs to understand how windows integrate with the rest of the wall assembly — housewrap or building paper, rain-screen or drainage gap detailing, siding overlap — not just how to set a window unit into an opening. On a lake-facing or moisture-heavy site like Silver Beach, that coordination is what determines whether the finished wall actually sheds water the way it's designed to.
The Flashing Sequence That Keeps a New Home Dry
Most window leaks we're called out to fix, on new and older homes alike, trace back to flashing that was installed out of order or left incomplete rather than to a defective window. On new construction, there's no excuse for getting this wrong, because every layer is accessible before it gets covered. The sequence we follow, on every opening, every time:
- Sill pan flashing installed first, pitched to drain water outward and away from the rough opening rather than letting it pool under the window
- Jamb flashing applied up both sides of the opening, integrated with the sill pan rather than simply overlapping it
- The window set into the opening, shimmed level and plumb, and fastened through the nailing flange per the manufacturer's schedule
- Head flashing installed above the window, lapped correctly so water sheds down and outward over the layers below
- Housewrap or building paper lapped over the top flange in shingle fashion, so every layer drains onto the one below it rather than behind it
- Weep paths and any rain-screen drainage gap left clear and functional once siding goes on over the top
None of this adds meaningfully to the cost or timeline of a new build relative to the rest of the framing and dry-in schedule. Skipping or reordering it is what turns a brand-new home into one with hidden water damage behind the siding within a handful of wet seasons.
Choosing Window Products for a New Silver Beach Build
Product selection on new construction is partly about long-term performance in this climate and partly about meeting Washington's building and energy code requirements, which set minimum standards for window performance and, for bedrooms, require an emergency escape opening of adequate size. We'll walk through those code requirements with you and your builder as part of planning the window package, rather than leaving it as a surprise at inspection.
| Frame Material | Moisture & Corrosion Behavior | Typical Maintenance | Fit for a Lake Whatcom New Build |
|---|---|---|---|
| Vinyl | Won't rot; performance depends heavily on weld and seam quality | Low; occasional track and weep-hole cleaning | Solid, budget-friendly choice when installation is done correctly |
| Fiberglass | Dimensionally stable, resists moisture and corrosion well | Low | Strong long-term option for exposed, lake-facing walls |
| Wood, painted or clad | Attractive but vulnerable at joints and sills without diligent upkeep | Higher; regular paint or finish maintenance | Workable on sheltered elevations, higher upkeep on lake-facing walls |
| Aluminum | Conducts cold and can corrode over time in salt-influenced marine air | Moderate | Least suited to sustained marine and lake exposure without a quality finish |
There's no single right answer for every home — orientation, budget, and how much of the house faces the lake directly all factor into it. We'll help you match frame material and glass package to each elevation's actual exposure rather than specifying one window across the whole house by default.
Timing: Windows and the Build Schedule
Windows are one of the milestones that determine when a new home can be considered "dried in" — enclosed enough that interior framing, insulation, and finish work can proceed without weather risk. In a climate that sees regular rain across most of the year, the gap between framing and dry-in is a real vulnerability: an open house during a wet stretch can mean soaked framing lumber, delayed schedules, and mold risk before the walls are even closed up. We coordinate directly with the builder or general contractor on scheduling, and we can sequence window installation to minimize how long any opening sits exposed, which matters more on this side of the state than it does in a drier climate.
Site-Specific Considerations for a Silver Beach New Build
Silver Beach lots vary a lot over a short distance — some sit low and close to the water with a full lake-facing exposure, others are set back and shaded by trees on the slope above. On a new build, that's a design input, not an afterthought: a lake-facing wall may call for a heavier-duty frame material, more conservative flashing details, or glass with a different solar heat gain rating than a shaded, uphill wall on the same house. We walk the site plan with this in mind before window selection is finalized, since the difference between "adequate" and "correct" on this lakeshore usually comes down to matching the spec to each wall's real exposure.
Why Hiring a Crew That Already Works Silver Beach Matters
A crew that's installed windows on new builds around this lake through multiple wet seasons has already seen how salt-tinged air, lake wind, and shade patterns play out on real houses, not just how a product performs on a spec sheet. That experience shows up in decisions builders and homeowners don't always think to ask about: how much extra attention a given lake-facing elevation needs, how a sill pan should be pitched for the wind and rain a specific lot actually sees, and which flashing details are worth the extra time on install day so the general contractor isn't dealing with a callback two winters later. It also means understanding the difference between a sheltered inland new build and a shoreline one, and not applying the same approach to both.
Our Process for New-Construction Window Installation
We start by reviewing the plans and window schedule with the builder or homeowner, checking that product selections match each wall's exposure and meet code requirements for performance and egress. On site, we confirm rough openings are correctly sized and square before installation begins, follow the same flashing sequence on every opening, and document the work as it's covered so there's a clear record of what's behind the siding. A few things worth confirming with any installer before window work begins on a new build:
- Ask them to walk through their exact flashing sequence, not just what window brand they're installing
- Confirm current Washington contractor licensing and active liability insurance
- Ask how they coordinate scheduling with the general contractor to minimize how long framing sits exposed to weather
- Ask whether they'll vary window specification by wall exposure or use one spec across the whole house
- Get a written scope covering products, flashing details, and warranty terms before work begins
If you're planning a new build, addition, or rebuild in Silver Beach and want windows installed right from the start, we're glad to walk the plans with you or your builder and give an honest read on what each elevation needs. Reach out using the form below to schedule a free, no-pressure estimate.